| Main |
| Ordering |
| History |
| FAQ |
| Contact |
| Lab Centrifuge |
| Gallery |
| Videos |
| About |
|
Photo Gallery - This gallery represents the work over several years. Some designs have been replaced and/or updated as time progressed. Most images contain a date stamp visable on the large version. Please note the date when viewing. We are always experimenting with new concepts and designs. If you have any questions about any photo please contact us. Total photos in gallery 1296 - Latest photo update 2021/12/10 18:48:01 Asterisk(*) indicates new photos in the past 30 days |
||
|
Adapter 56C to 56J (
15
) Algae Recovery ( 42 ) Bacterial fermentation ( 1 ) Balancer Mandrels ( 8 ) Bearing replacement ( 25 ) Botry Culture ( 2 ) Building a gantry ( 16 ) Chestnut Extract ( 9 ) CNC Coolant ( 6 ) Coconut Oil ( 8 ) Construction ( 43 ) Contaminated diesel ( 2 ) Craig's Machine ( 31 ) Cross Drill End Bell ( 10 ) Crude oil ( 5 ) Custom motor shaft ( 23 ) Experimental Motor ( 19 ) Explosion proof motor ( 3 ) Feed Cone ( 29 ) Feed Cone with Fins ( 8 ) Feed Tube ( 3 ) Filter Paper ( 7 ) Ford on WMO ( 2 ) Foundry ( 5 ) Foundry 2 ( 18 ) Gear pump ( 2 ) Grinding fluid ( 19 ) Grinding fluid 2 ( 14 ) Heaters ( 9 ) History ( 11 ) Homemade Diesel ( 7 ) Homemade diesel 2 ( 41 ) Homemade Diesel 3 ( 15 ) Homemade Diesel 4 ( 12 ) How it works ( 3 ) Hydraulic Oil ( 3 ) Keyless Bushing ( 11 ) Lab Centrifuge ( 16 ) Lab Centrifuge 2 ( 18 ) Lapidary Cutting Oil ( 2 ) Lock motor shaft ( 6 ) Magnesol removal ( 6 ) Microwave heater ( 7 ) Misc. Mods ( 4 ) Mitsubishi 4x4 on WMO ( 10 ) New Feed Cone ( 16 ) New Feed Tube ( 7 ) New Rotor 2013 ( 24 ) New rotor design ( 16 ) Oil and Contaminants ( 47 ) Oil Skimmer ( 8 ) Our Shop ( 37 ) Peristaltic Pump ( 32 ) Powder Coating ( 10 ) Renderings ( 8 ) Retrofit rotor for WVOD ( 17 ) Rework Mount ( 10 ) Rotor fins ( 34 ) Rotor Fins One Piece ( 6 ) Seal ( 6 ) Sea Weed ( 4 ) Sediment removal ( 16 ) See thru lid - Building ( 16 ) See thru lid - Testing ( 28 ) Sight Glass ( 6 ) Skim Tube ( 56 ) Skim Tube for VCO ( 8 ) Small Settling Tank ( 14 ) Tanks ( 9 ) Tanks - Complete System ( 13 ) Tap drain ( 10 ) Testing Seal Screws ( 6 ) Tests by fuelfarmer ( 22 ) Turn key machine ( 38 ) Two part rotor ( 30 ) Ultrasonic filter cleaning ( 8 ) Updates ( 26 ) Users Machines ( 34 ) Vacuum pickup ( 3 ) VW on WMO ( 7 ) Water-Oil Seperator ( 7 ) Water trap ( 5 ) Wine Clarification ( 4 ) WVO Heat Tests ( 7 ) WVO Pump ( 6 ) WVO Tests ( 14 ) |
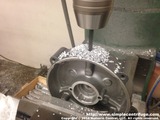
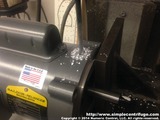
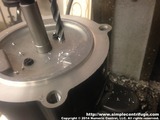
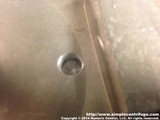
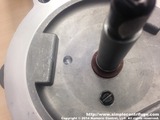
Cross Drill End Bell On the early machines circa 2007, before the taper mount, the casting had a very short shoulder that relied on a rubber washer to act as a slinger seal. This generally prevented oil from entering the motor. It worked fine for a lot of customers but some liquids drained at different rates invariably leading to leakage into the motor. Repairing the motor is as simple as replacing the bearings but to prevent future issues we recommend drilling a drain into the DE (drive end) end bell. The process is simple and can be accomplished on a drill press. Here's how I did it. I used a 17/64th drill but a 1/4" would have been fine. I used what was handy. |
|
