Simple Centrifuge
Clean waste vegetable oil (WVO), bio diesel, lube oils, and even hydraulic oil in your garage
Main
Ordering
History
FAQ
Contact
Lab Centrifuge
Gallery
Videos
About
 
Photo Gallery - This gallery represents the work over several years. Some designs have been replaced and/or updated as time progressed. Most images contain a date stamp visable on the large version. Please note the date when viewing. We are always experimenting with new concepts and designs. If you have any questions about any photo please contact us.
Total photos in gallery 1296 - Latest photo update 2021/12/10 18:48:01
Asterisk(*) indicates new photos in the past 30 days
Adapter 56C to 56J ( 15 )
Algae Recovery ( 42 )
Bacterial fermentation ( 1 )
Balancer Mandrels ( 8 )
Bearing replacement ( 25 )
Botry Culture ( 2 )
Building a gantry ( 16 )
Chestnut Extract ( 9 )
CNC Coolant ( 6 )
Coconut Oil ( 8 )
Construction ( 43 )
Contaminated diesel ( 2 )
Craig's Machine ( 31 )
Cross Drill End Bell ( 10 )
Crude oil ( 5 )
Custom motor shaft ( 23 )
Experimental Motor ( 19 )
Explosion proof motor ( 3 )
Feed Cone ( 29 )
Feed Cone with Fins ( 8 )
Feed Tube ( 3 )
Filter Paper ( 7 )
Ford on WMO ( 2 )
Foundry ( 5 )
Foundry 2 ( 18 )
Gear pump ( 2 )
Grinding fluid ( 19 )
Grinding fluid 2 ( 14 )
Heaters ( 9 )
History ( 11 )
Homemade Diesel ( 7 )
Homemade diesel 2 ( 41 )
Homemade Diesel 3 ( 15 )
Homemade Diesel 4 ( 12 )
How it works ( 3 )
Hydraulic Oil ( 3 )
Keyless Bushing ( 11 )
Lab Centrifuge ( 16 )
Lab Centrifuge 2 ( 18 )
Lapidary Cutting Oil ( 2 )
Lock motor shaft ( 6 )
Magnesol removal ( 6 )
Microwave heater ( 7 )
Misc. Mods ( 4 )
Mitsubishi 4x4 on WMO ( 10 )
New Feed Cone ( 16 )
New Feed Tube ( 7 )
New Rotor 2013 ( 24 )
New rotor design ( 16 )
Oil and Contaminants ( 47 )
Oil Skimmer ( 8 )
Our Shop ( 37 )
Peristaltic Pump ( 32 )
Powder Coating ( 10 )
Renderings ( 8 )
Retrofit rotor for WVOD ( 17 )
Rework Mount ( 10 )
Rotor fins ( 34 )
Rotor Fins One Piece ( 6 )
Seal ( 6 )
Sea Weed ( 4 )
Sediment removal ( 16 )
See thru lid - Building ( 16 )
See thru lid - Testing ( 28 )
Sight Glass ( 6 )
Skim Tube ( 56 )
Skim Tube for VCO ( 8 )
Small Settling Tank ( 14 )
Tanks ( 9 )
Tanks - Complete System ( 13 )
Tap drain ( 10 )
Testing Seal Screws ( 6 )
Tests by fuelfarmer ( 22 )
Turn key machine ( 38 )
Two part rotor ( 30 )
Ultrasonic filter cleaning ( 8 )
Updates ( 26 )
Users Machines ( 34 )
Vacuum pickup ( 3 )
VW on WMO ( 7 )
Water-Oil Seperator ( 7 )
Water trap ( 5 )
Wine Clarification ( 4 )
WVO Heat Tests ( 7 )
WVO Pump ( 6 )
WVO Tests ( 14 )
Sediment removal
My brother lives in Cooper Landing, Alaska on Kenai Lake. He recently sent me some well water samples that are typical for the area. The samples contains a lot of very fine glacial till sediment. Over time it settles in the pipes and causes real problems. Filtering it has proven challenging and expensive. He wanted to see if the centrifuge could do anything with it. These are my initial results. This is an ongoing work. Water may require some modifications to the rotor design. The filtering company said the centrifuge wouldn't be able to pull out such fine sediment. I am happy to report it can but not as quickly as I hoped. Next week I will run some tests on the full sized rotor rather than this prototype.
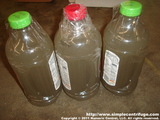
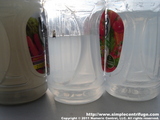
These are the samples. Some of the larger sediment has settled in the week it took for the samples to arrive. On the initial pass I poured the material through in about 30 seconds. It is noticeably more clear but still not crystal clear.
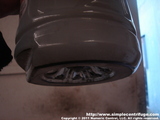
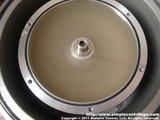
I decide to stop the machine an install the clear lid so I can see what's happening inside. The rotor is full of very dark water. After restarting with the clear lid the sample didn't clear up instantly. After a few minutes the sample is now crystal clear and you can see some very fine brownish sediment in the upper part of the outside wall. The heavy sediment line is still near the bottom.
I then drew a 60cc sample of the shaken sample. I wanted to see if the camera could capture any mixing action. At the midway I snapped this photo. The sample still appears very clear. The feed is very slow, maybe 1 gallon per hour. This is the finished test. The water still appears very clear at this feed rate.
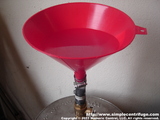
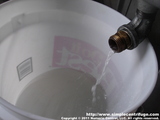
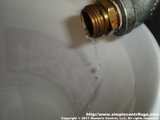
I setup a funnel and ball valve to control the feed into the centrifuge. I turned up the speed on the centrifuge to 7000 rpm and fed the water through the machine as before. At 7000 rpm the machine generates over 5000 g. I was hoping this would clear up the water. No real change. Water is very sensitive to turbulence, much more than oil. I then slowed the feed to a trickle. Maybe a gallon per hour.
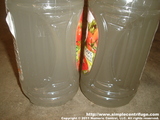
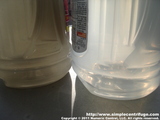
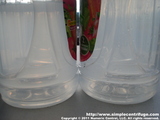
You can now almost see through the finished sample but it's still a little milky. These are the two samples side by side. The second sample came out notable more clear than the second. I suspect that some of the turbidity of the first sample was caused by the start up turbidity of the rotor having not completely cleared. I might rerun the first sample again.
The second sample on the right is almost good enough to drink.    
Numeric Control, LLC
PO Box 916
Morton, WA 98356