Simple Centrifuge
Clean waste vegetable oil (WVO), bio diesel, lube oils, and even hydraulic oil in your garage
Main
Ordering
History
FAQ
Contact
Lab Centrifuge
Gallery
Videos
About
 
Photo Gallery - This gallery represents the work over several years. Some designs have been replaced and/or updated as time progressed. Most images contain a date stamp visable on the large version. Please note the date when viewing. We are always experimenting with new concepts and designs. If you have any questions about any photo please contact us.
Total photos in gallery 1296 - Latest photo update 2021/12/10 18:48:01
Asterisk(*) indicates new photos in the past 30 days
Adapter 56C to 56J ( 15 )
Algae Recovery ( 42 )
Bacterial fermentation ( 1 )
Balancer Mandrels ( 8 )
Bearing replacement ( 25 )
Botry Culture ( 2 )
Building a gantry ( 16 )
Chestnut Extract ( 9 )
CNC Coolant ( 6 )
Coconut Oil ( 8 )
Construction ( 43 )
Contaminated diesel ( 2 )
Craig's Machine ( 31 )
Cross Drill End Bell ( 10 )
Crude oil ( 5 )
Custom motor shaft ( 23 )
Experimental Motor ( 19 )
Explosion proof motor ( 3 )
Feed Cone ( 29 )
Feed Cone with Fins ( 8 )
Feed Tube ( 3 )
Filter Paper ( 7 )
Ford on WMO ( 2 )
Foundry ( 5 )
Foundry 2 ( 18 )
Gear pump ( 2 )
Grinding fluid ( 19 )
Grinding fluid 2 ( 14 )
Heaters ( 9 )
History ( 11 )
Homemade Diesel ( 7 )
Homemade diesel 2 ( 41 )
Homemade Diesel 3 ( 15 )
Homemade Diesel 4 ( 12 )
How it works ( 3 )
Hydraulic Oil ( 3 )
Keyless Bushing ( 11 )
Lab Centrifuge ( 16 )
Lab Centrifuge 2 ( 18 )
Lapidary Cutting Oil ( 2 )
Lock motor shaft ( 6 )
Magnesol removal ( 6 )
Microwave heater ( 7 )
Misc. Mods ( 4 )
Mitsubishi 4x4 on WMO ( 10 )
New Feed Cone ( 16 )
New Feed Tube ( 7 )
New Rotor 2013 ( 24 )
New rotor design ( 16 )
Oil and Contaminants ( 47 )
Oil Skimmer ( 8 )
Our Shop ( 37 )
Peristaltic Pump ( 32 )
Powder Coating ( 10 )
Renderings ( 8 )
Retrofit rotor for WVOD ( 17 )
Rework Mount ( 10 )
Rotor fins ( 34 )
Rotor Fins One Piece ( 6 )
Seal ( 6 )
Sea Weed ( 4 )
Sediment removal ( 16 )
See thru lid - Building ( 16 )
See thru lid - Testing ( 28 )
Sight Glass ( 6 )
Skim Tube ( 56 )
Skim Tube for VCO ( 8 )
Small Settling Tank ( 14 )
Tanks ( 9 )
Tanks - Complete System ( 13 )
Tap drain ( 10 )
Testing Seal Screws ( 6 )
Tests by fuelfarmer ( 22 )
Turn key machine ( 38 )
Two part rotor ( 30 )
Ultrasonic filter cleaning ( 8 )
Updates ( 26 )
Users Machines ( 34 )
Vacuum pickup ( 3 )
VW on WMO ( 7 )
Water-Oil Seperator ( 7 )
Water trap ( 5 )
Wine Clarification ( 4 )
WVO Heat Tests ( 7 )
WVO Pump ( 6 )
WVO Tests ( 14 )
Rotor fins
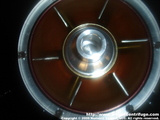
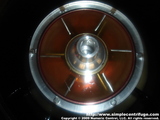
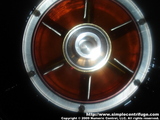
I have wanted to make some fins to put in the centrifuge for a long time. With this experimental clear lid, I REALLY wanted to see the action. I spent the day building this prototype.
I used this prototype while collecting algae in an attempt to boost it's performance.
UPDATE: 2014-01-23 After a few years I decided to play with the rotor fins some more. New photos start at number 23. While this test wasn't totally sucessful I did learn that the fins do indeed make a huge difference in the running of the rotor. As a result I have built a new feed cone that incorporates some the key concepts.
Read more: New Feed Cone
UPDATE: 2014-09-16, The new key slot locking design is done and working well. See the photos starting at number 26.
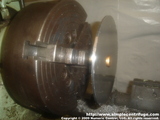
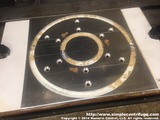
It is really cold in the shop. The liquid shortening is super thick. I started by whacking out the basic shape on the plasma cutter. I trued up the hole with a chucking reamer.
I put the disk in a slitting saw holder. Not ideal but it was quick. Truing up the outside diameter. This is the finished od. I used the electric sander to quickly bevel the od to match the radius of the rotor.
Bored the id to size. I folded some fins on the vise. I still had the mdf setup from the other day. I pre-drilled it for the wood screws.
I screwed the disc down and counter sunk the holes for the fins. Tapping for the machine screws. This is the first fin installed. Five more to go.
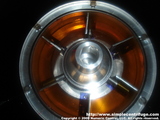
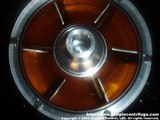
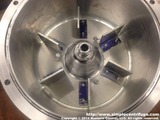
From the underside. All the fins installed. These are the fins installed in the rotor.
The fins appear to be separating the hydrogenated portion of the oil. Normally you have to go real slow for this but not now. I'm feeding fast and the oil clears right up. This is after adding a 50% colored water and oil sample quickly. The oil didn't cloud much and quickly cleared. You can see how clear the oil is. Nothing like the thick mess I fed in. Note the thing colored water layer.
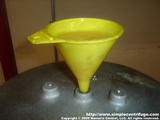
I decided to add this creamy oil as fast as the funnel could feed it. This is after adding about a quart. About 30 seconds later.
About a minute later. Modified the rotor fin assembly to install it in the new rotor for testing. The ID had to be opened up a bit on the lathe. Installed the fins in the rotor.
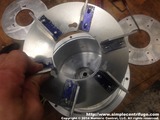
After starting up the rotor the fins, which was free to move, moved up expectantly. I was startled at first but notice the rotor ran very smooth despite the fins floating mid-way to find their own center. Normally, water will have a rough look and feel, this is due to the effect of earths gravity on the rotating mass. Water just doesn't cling together well. But in this case the water was glass smooth, just like oil. After several months of playing with designs I finally decided to use a key hole design. Easy to remove and no holes in the rotor. First step was to thread mill some for the shoulder bolts. This is a photo of the studs installed into the rotor.
This is a the stud. Three like this are installed into the bottom of the rotor to retain the fins. Next was to cut a sample part. This sample was used to verify the proper direction prior to adding the fin mounts.
Once the fit was good. The key slots were flipped and moved so that during operation the stud bolts would be between the fins for better distribution. After deburring, the fins from the previous prototype were moved to the base plate. The back side of the base plate.
The fins installed in the rotor. The fit is snug, yet easy to remove. The fins will not come loose during operation as the rotation direction keeps them in the key slots.    
Numeric Control, LLC
PO Box 916
Morton, WA 98356