Simple Centrifuge
Clean waste vegetable oil (WVO), bio diesel, lube oils, and even hydraulic oil in your garage
Main
Ordering
History
FAQ
Contact
Lab Centrifuge
Gallery
Videos
About
 
Photo Gallery - This gallery represents the work over several years. Some designs have been replaced and/or updated as time progressed. Most images contain a date stamp visable on the large version. Please note the date when viewing. We are always experimenting with new concepts and designs. If you have any questions about any photo please contact us.
Total photos in gallery 1296 - Latest photo update 2021/12/10 18:48:01
Asterisk(*) indicates new photos in the past 30 days
Adapter 56C to 56J ( 15 )
Algae Recovery ( 42 )
Bacterial fermentation ( 1 )
Balancer Mandrels ( 8 )
Bearing replacement ( 25 )
Botry Culture ( 2 )
Building a gantry ( 16 )
Chestnut Extract ( 9 )
CNC Coolant ( 6 )
Coconut Oil ( 8 )
Construction ( 43 )
Contaminated diesel ( 2 )
Craig's Machine ( 31 )
Cross Drill End Bell ( 10 )
Crude oil ( 5 )
Custom motor shaft ( 23 )
Experimental Motor ( 19 )
Explosion proof motor ( 3 )
Feed Cone ( 29 )
Feed Cone with Fins ( 8 )
Feed Tube ( 3 )
Filter Paper ( 7 )
Ford on WMO ( 2 )
Foundry ( 5 )
Foundry 2 ( 18 )
Gear pump ( 2 )
Grinding fluid ( 19 )
Grinding fluid 2 ( 14 )
Heaters ( 9 )
History ( 11 )
Homemade Diesel ( 7 )
Homemade diesel 2 ( 41 )
Homemade Diesel 3 ( 15 )
Homemade Diesel 4 ( 12 )
How it works ( 3 )
Hydraulic Oil ( 3 )
Keyless Bushing ( 11 )
Lab Centrifuge ( 16 )
Lab Centrifuge 2 ( 18 )
Lapidary Cutting Oil ( 2 )
Lock motor shaft ( 6 )
Magnesol removal ( 6 )
Microwave heater ( 7 )
Misc. Mods ( 4 )
Mitsubishi 4x4 on WMO ( 10 )
New Feed Cone ( 16 )
New Feed Tube ( 7 )
New Rotor 2013 ( 24 )
New rotor design ( 16 )
Oil and Contaminants ( 47 )
Oil Skimmer ( 8 )
Our Shop ( 37 )
Peristaltic Pump ( 32 )
Powder Coating ( 10 )
Renderings ( 8 )
Retrofit rotor for WVOD ( 17 )
Rework Mount ( 10 )
Rotor fins ( 34 )
Rotor Fins One Piece ( 6 )
Seal ( 6 )
Sea Weed ( 4 )
Sediment removal ( 16 )
See thru lid - Building ( 16 )
See thru lid - Testing ( 28 )
Sight Glass ( 6 )
Skim Tube ( 56 )
Skim Tube for VCO ( 8 )
Small Settling Tank ( 14 )
Tanks ( 9 )
Tanks - Complete System ( 13 )
Tap drain ( 10 )
Testing Seal Screws ( 6 )
Tests by fuelfarmer ( 22 )
Turn key machine ( 38 )
Two part rotor ( 30 )
Ultrasonic filter cleaning ( 8 )
Updates ( 26 )
Users Machines ( 34 )
Vacuum pickup ( 3 )
VW on WMO ( 7 )
Water-Oil Seperator ( 7 )
Water trap ( 5 )
Wine Clarification ( 4 )
WVO Heat Tests ( 7 )
WVO Pump ( 6 )
WVO Tests ( 14 )
Homemade diesel 2
Every since Gary first sent us some samples of his homemade diesel we have wanted to experiment with it. We have looked at his plans (which are very good) but I really wanted to examine the product on the small scale before building a large machine. So for the last few weeks we have been kicking around some ideas and this is the small prototype that we whipped up.
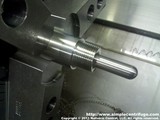
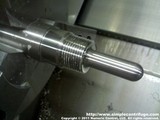
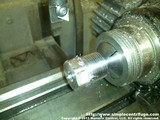
I started by making a sleeve for the heating element out of some 316 stainless steel round bar. I then cut some 3/4 NPT threads. Test fitting the cartridge heater.
Cut the wrench hex on the indexer. Installed the element into a 2 inch to 3/4 inch reducer bell. This will be the bottom of the heat tank. This is the very simple prototype oil distiller. The chamber has been half filled with used motor oil from my wife's car (straight from the drain pan).
After running for about an hour without much success I decided to insulate the tank. This almost instantly made things to start happening. This pushed the temperature well past 400 degrees Celsius. You can see a nice amber drop forming. This looks very promising. It actually filled the 8 oz. can in about 10 minutes. Insulation was the trick. Both samples side by side. Original used oil and distilled oil. The distilled oil is much thinner than the original oil and lighter in color.
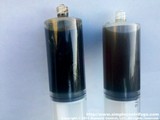
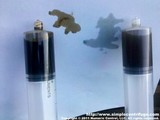
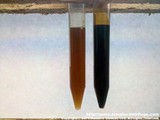
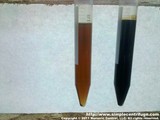
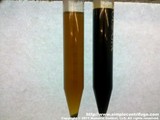
The oil samples side by side. The distilled oil on the right is much cleaner looking oil on the paper. Samples in vials ready to be spun in the lab centrifuge. The distilled oil is much lighter in color. After being spun in the centrifuge for about 5 minutes you can see a lot of particulate has settled out. Still not crystal clear.
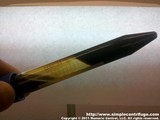
After centrifuging for 30 minutes you can see the numbers at the back of the vial. Still not crystal clear. After 1 hour in the lab centrifuge the sample is perfectly clear. This is what the chamber looked like when done. I did not run the process until it stop so there is likely still recoverable oil in the tar mass.
This is some of the tar mass from the processor. Next I decided to attempt some plastic. This is a 1 quart oil bottle that has been cut up. The bottom said it is HPDE 2. Almost instantly smoke started pouring out. I tried cooling the vapor without luck. I finally forced the smoke through water which formed a chalking looking plastic. Not what I wanted. The element burned out due to over heating. :(
Evidently plastics require a much more controlled heating than oil. So I replaced the 500 watt cartridge heater with a 400 watt heater with an integrate thermal couple. I also added a temperature control to bring it up nice and slow. After waiting for a while I decided to insulate it some more. After an hour or so I decide to take everything apart and get an idea of what's happening. It's not pretty.
This is all the plastic that never vaporized. I don't think I got it hot enough. After cleaning everything out I reset with some motor oil. Same stuff from earlier. After cranking the heat up to 1000 degrees I finally started getting results, one drip at a time. I put the wet cloth on the condenser tube in order to cool everything down.
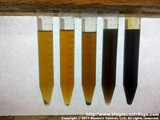
This is a sample before centrifuging. Instantly I can tell this is much better than before. It is crystal clear and lighter in color than the earlier batch. These are the samples side by side. Starting on the left is the previous sample centrifuged. Next is a sample Gary sent me that has been settled for 2 years. Yesterday's sample centrifuged, then the same batch not centrifuged. And finally the source oil, unprocessed. The insulation shows the kind of heat involved. The insulation nearest the chamber was white as if the yellow color had been burned out.
Despite leaving he machine running hot for an hour after the last drips stopped I was surprised to find liquid (about 1 cup drained in the can on the left). I also see some carbons built up on the heater. I centrifuged a bit of the hot mass left over. It separated into two separate phases. A liquid phase and a thick tar phase. Modified the machine to test feeding oil into the hot chamber.
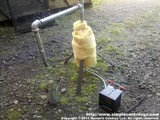
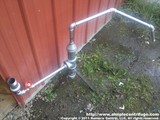
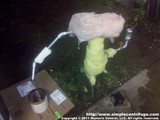
This is the machine during operation. Making fuel one drip at a time. A while ago I made a thermocouple well with the intention of putting it on the distillation unit. I decide to put it at the top exit elbow. I started by drilling a 5/8 I welded the thermo-well into the elbow and laid down some silicon bronze to ensure the weld didn't crack. I wasn't sure of the cast steel/iron of the fitting. I did remove the galvanized coating before welding it with acid. The thermocouple in this position monitors the vapor temperature and will produce a more carefully distilled product than monitoring the element thermocouple. I'm using pearlite (the white stuff) as my insulation.
This is the machine during operation. Making fuel one drip at a time. A while ago I made a thermocouple well with the intention of putting it on the distillation unit. I decide to put it at the top exit elbow. I started by drilling a 5/8" hole for it. I welded the thermo-well into the elbow and laid down some silicon bronze to ensure the weld didn't crack. I wasn't sure of the cast steel/iron of the fitting. I did remove the galvanized coating before welding it with acid. The thermocouple in this position monitors the vapor temperature and will produce a more carefully distilled product than monitoring the element thermocouple. I'm using pearlite (the white stuff) as my insulation.
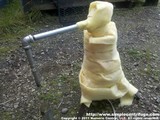
The pearlite insulation is doing a fantastic job. Burning it off. The temperature control is working very well.
Collecting the distilled oil. Distilled ATF on the left. A sample of the ATF on the right. Glad that didn't come out of my transmission. You can see some debris in the distilled ATF which is likely residue from earlier tests in the distillation unit. After centrifuging you can see clearly through the distilled ATF on the left. Note that the numbers are reversed, your seeing them through the oil.
Both the distilled ATF and the control sample ATF were centrifuged for the same time. Distillation leaves all the foreign materials behind. Some of the pearlite insulation looks a little toasty brown but overall the insulation held up great.  
Numeric Control, LLC
PO Box 916
Morton, WA 98356