Simple Centrifuge
Clean waste vegetable oil (WVO), bio diesel, lube oils, and even hydraulic oil in your garage
Main
Ordering
History
FAQ
Contact
Lab Centrifuge
Gallery
Videos
About
 
Photo Gallery - This gallery represents the work over several years. Some designs have been replaced and/or updated as time progressed. Most images contain a date stamp visable on the large version. Please note the date when viewing. We are always experimenting with new concepts and designs. If you have any questions about any photo please contact us.
Total photos in gallery 1296 - Latest photo update 2021/12/10 18:48:01
Asterisk(*) indicates new photos in the past 30 days
Adapter 56C to 56J ( 15 )
Algae Recovery ( 42 )
Bacterial fermentation ( 1 )
Balancer Mandrels ( 8 )
Bearing replacement ( 25 )
Botry Culture ( 2 )
Building a gantry ( 16 )
Chestnut Extract ( 9 )
CNC Coolant ( 6 )
Coconut Oil ( 8 )
Construction ( 43 )
Contaminated diesel ( 2 )
Craig's Machine ( 31 )
Cross Drill End Bell ( 10 )
Crude oil ( 5 )
Custom motor shaft ( 23 )
Experimental Motor ( 19 )
Explosion proof motor ( 3 )
Feed Cone ( 29 )
Feed Cone with Fins ( 8 )
Feed Tube ( 3 )
Filter Paper ( 7 )
Ford on WMO ( 2 )
Foundry ( 5 )
Foundry 2 ( 18 )
Gear pump ( 2 )
Grinding fluid ( 19 )
Grinding fluid 2 ( 14 )
Heaters ( 9 )
History ( 11 )
Homemade Diesel ( 7 )
Homemade diesel 2 ( 41 )
Homemade Diesel 3 ( 15 )
Homemade Diesel 4 ( 12 )
How it works ( 3 )
Hydraulic Oil ( 3 )
Keyless Bushing ( 11 )
Lab Centrifuge ( 16 )
Lab Centrifuge 2 ( 18 )
Lapidary Cutting Oil ( 2 )
Lock motor shaft ( 6 )
Magnesol removal ( 6 )
Microwave heater ( 7 )
Misc. Mods ( 4 )
Mitsubishi 4x4 on WMO ( 10 )
New Feed Cone ( 16 )
New Feed Tube ( 7 )
New Rotor 2013 ( 24 )
New rotor design ( 16 )
Oil and Contaminants ( 47 )
Oil Skimmer ( 8 )
Our Shop ( 37 )
Peristaltic Pump ( 32 )
Powder Coating ( 10 )
Renderings ( 8 )
Retrofit rotor for WVOD ( 17 )
Rework Mount ( 10 )
Rotor fins ( 34 )
Rotor Fins One Piece ( 6 )
Seal ( 6 )
Sea Weed ( 4 )
Sediment removal ( 16 )
See thru lid - Building ( 16 )
See thru lid - Testing ( 28 )
Sight Glass ( 6 )
Skim Tube ( 56 )
Skim Tube for VCO ( 8 )
Small Settling Tank ( 14 )
Tanks ( 9 )
Tanks - Complete System ( 13 )
Tap drain ( 10 )
Testing Seal Screws ( 6 )
Tests by fuelfarmer ( 22 )
Turn key machine ( 38 )
Two part rotor ( 30 )
Ultrasonic filter cleaning ( 8 )
Updates ( 26 )
Users Machines ( 34 )
Vacuum pickup ( 3 )
VW on WMO ( 7 )
Water-Oil Seperator ( 7 )
Water trap ( 5 )
Wine Clarification ( 4 )
WVO Heat Tests ( 7 )
WVO Pump ( 6 )
WVO Tests ( 14 )
Retrofit rotor for WVOD
Do you have a Raw Power centrifuge made by WVO Designs? Do you want more capacity? Do you want feed cone technology? Quick taper mounting? Well we have the answer. We have made a rotor based on our popular two part rotor. This triples the capacity of the open rotor.
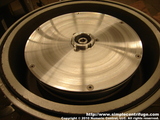
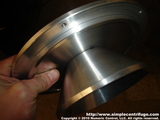
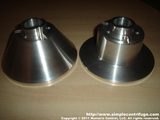
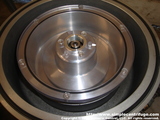
This is the two part rotor, redesigned to fit the wvod chassis. This included the internal feed horn. This is the rotor stopped. This is the internal feed horn.
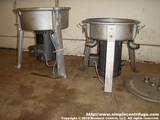
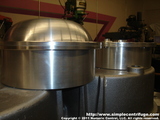
This is a photo of the two machines side by side. The Simple Centrifuge machine on the left has 36 lbs castings. The WVOD machine on the right has a thin 12 lbs casting. This photo shows the size comparison between the domed rotor and the flat rotor. The funnel shaped feed horn has be redesigned to look more like a hat. The hat design provides greater area inside the rotor verses leaving material in the feed cone. Changed the exit hole location slightly to improve flow.
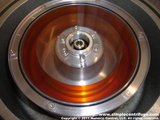
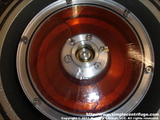
This is a photo showing the new exit holes. Larger holes will allow for greater flow. Made a clear lexan lid for the new rotor. This shows clearly how everything is assembled. After running some tests with water we started running WVO. Here you can see the rotor filling.
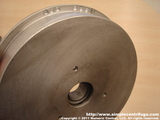
This is the full rotor. It holds better than 1.5 liters. Not bad considering the space limitations of the chassis. This is the stopped rotor. You can see that the machine isn't level by the air bubble. Normally I would have leveled the machine. The center hub is sealed so you can lift the entire rotor off the machine for cleaning. The original cast rotor that shipped with the machine. It was out of balance by about 8 grams. This is the rotor after being sent out for dynamic balancing. This should run much smoother. Casting will always leave voids and imperfections that require balancing. Cast aluminum should also be heat treated (tempered) to ensure full strength. We made a video showing the machine before balancing: http://www.youtube.com/watch?v=z3cJnUVsjq8
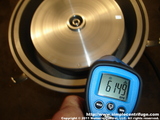
Testing the rotor at 100 Hz using a VFD. Testing at around 160 Hz which is the saturation point for this small VFD and motor combination. During testing we took the rotor to 9500 rpm... well beyond the designed range. This is the original stock mount. This will be removed and replaced with a stainless taper.
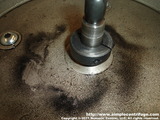
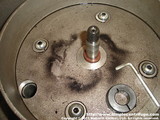
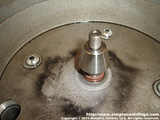
Remove the shaft collar and the plastic thread protector. This is the stainless steel taper installed on the motor shaft. The rotor rides on the taper and a custom nut/bolt combination in the rotor hold the rotor in place during operation.  
Numeric Control, LLC
PO Box 916
Morton, WA 98356