Simple Centrifuge
Clean waste vegetable oil (WVO), bio diesel, lube oils, and even hydraulic oil in your garage
Main
Ordering
History
FAQ
Contact
Lab Centrifuge
Gallery
Videos
About
 
Photo Gallery - This gallery represents the work over several years. Some designs have been replaced and/or updated as time progressed. Most images contain a date stamp visable on the large version. Please note the date when viewing. We are always experimenting with new concepts and designs. If you have any questions about any photo please contact us.
Total photos in gallery 1296 - Latest photo update 2021/12/10 18:48:01
Asterisk(*) indicates new photos in the past 30 days
Adapter 56C to 56J ( 15 )
Algae Recovery ( 42 )
Bacterial fermentation ( 1 )
Balancer Mandrels ( 8 )
Bearing replacement ( 25 )
Botry Culture ( 2 )
Building a gantry ( 16 )
Chestnut Extract ( 9 )
CNC Coolant ( 6 )
Coconut Oil ( 8 )
Construction ( 43 )
Contaminated diesel ( 2 )
Craig's Machine ( 31 )
Cross Drill End Bell ( 10 )
Crude oil ( 5 )
Custom motor shaft ( 23 )
Experimental Motor ( 19 )
Explosion proof motor ( 3 )
Feed Cone ( 29 )
Feed Cone with Fins ( 8 )
Feed Tube ( 3 )
Filter Paper ( 7 )
Ford on WMO ( 2 )
Foundry ( 5 )
Foundry 2 ( 18 )
Gear pump ( 2 )
Grinding fluid ( 19 )
Grinding fluid 2 ( 14 )
Heaters ( 9 )
History ( 11 )
Homemade Diesel ( 7 )
Homemade diesel 2 ( 41 )
Homemade Diesel 3 ( 15 )
Homemade Diesel 4 ( 12 )
How it works ( 3 )
Hydraulic Oil ( 3 )
Keyless Bushing ( 11 )
Lab Centrifuge ( 16 )
Lab Centrifuge 2 ( 18 )
Lapidary Cutting Oil ( 2 )
Lock motor shaft ( 6 )
Magnesol removal ( 6 )
Microwave heater ( 7 )
Misc. Mods ( 4 )
Mitsubishi 4x4 on WMO ( 10 )
New Feed Cone ( 16 )
New Feed Tube ( 7 )
New Rotor 2013 ( 24 )
New rotor design ( 16 )
Oil and Contaminants ( 47 )
Oil Skimmer ( 8 )
Our Shop ( 37 )
Peristaltic Pump ( 32 )
Powder Coating ( 10 )
Renderings ( 8 )
Retrofit rotor for WVOD ( 17 )
Rework Mount ( 10 )
Rotor fins ( 34 )
Rotor Fins One Piece ( 6 )
Seal ( 6 )
Sea Weed ( 4 )
Sediment removal ( 16 )
See thru lid - Building ( 16 )
See thru lid - Testing ( 28 )
Sight Glass ( 6 )
Skim Tube ( 56 )
Skim Tube for VCO ( 8 )
Small Settling Tank ( 14 )
Tanks ( 9 )
Tanks - Complete System ( 13 )
Tap drain ( 10 )
Testing Seal Screws ( 6 )
Tests by fuelfarmer ( 22 )
Turn key machine ( 38 )
Two part rotor ( 30 )
Ultrasonic filter cleaning ( 8 )
Updates ( 26 )
Users Machines ( 34 )
Vacuum pickup ( 3 )
VW on WMO ( 7 )
Water-Oil Seperator ( 7 )
Water trap ( 5 )
Wine Clarification ( 4 )
WVO Heat Tests ( 7 )
WVO Pump ( 6 )
WVO Tests ( 14 )
Lab Centrifuge
Sometimes we have a customer that has oil that is really tough to separate. In order to establish a recommended separation rate we use a lab centrifuge. We have always wanted a real lab centrifuge to replace our homemade one. This will take a lot of guess work. UPDATE: I have created a calculator to convert from the lab centrifuge to gph flow.
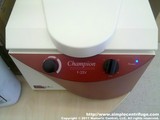
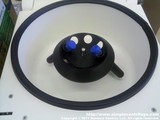
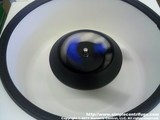
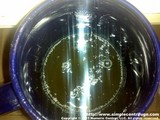
This is an F-33V from Ample Scientific LLC. It does around 3000 rpm and generates 1350 g. This model can hold up to 8 vials. We're using two for this test. This is an action photo. The manual suggests waiting until it comes to a complete stop before opening the lid.
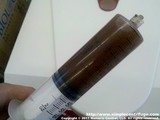
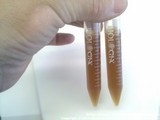
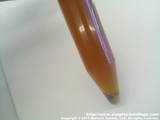
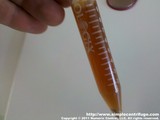
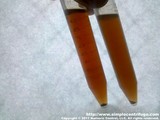
This is a sample of WVO from a customer in Florida. These samples will be run at ambient temperature initially. Measured out two 10ml samples. This is after 10 minutes. You can see a fat layer forming.
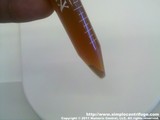
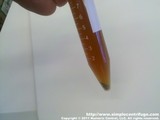
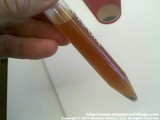
This is after 30 minutes. You can see some very fine black lines in the fat layer. This is after 1 hour. Not much of a change and definitely not crystal clear. After 1.5 hours the sample appears to be clearing slightly. Not sure if it's visible in the picture.
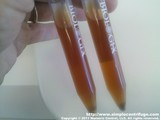
After 1.5 hours. After 2 hours. I heated one of the samples by placing the sample in a cup of water in the microwave. The sample went perfectly clear. It is hard to tell how clear it is from the photo but the heated sample on the right is crystal clear.
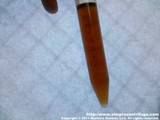
I heated a sample in the microwave for a few minutes. It is hard to tell from the photo but the oil is boiling which suggests it may contain water and or other contaminants. Hot oil should generally be fairly calm. The temperature measured with the IR gun was around 350F. I allowed the heated sample to cool then did a side by side test by centrifuging one warmed sample and one sample drawn prior to heating. The warmed sample went clear. The cold sample remained cloudy. Also worth noting the white stuff that collects at the bottom of the vial is missing from the heated sample. UPDATE: Even after 24 hours the clear sample remained clear. Heating plays a large part in stability of clarity. I let the sample that was heated settle for a few days. I then centrifuged it for a few minutes. As you can see there is a little bit of particulate that the centrifuge pulled out.
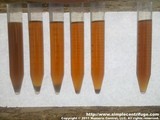
This is a collection of random samples that have rested for a few days. All but the left most sample is clear. The sample apart to the far right was heated to 350F degrees and settled for a couple days before being centrifuge. Note how much less particulate is present in the sample.    
Numeric Control, LLC
PO Box 916
Morton, WA 98356