Simple Centrifuge
Clean waste vegetable oil (WVO), bio diesel, lube oils, and even hydraulic oil in your garage
Main
Ordering
History
FAQ
Contact
Lab Centrifuge
Gallery
Videos
About
 
Photo Gallery - This gallery represents the work over several years. Some designs have been replaced and/or updated as time progressed. Most images contain a date stamp visable on the large version. Please note the date when viewing. We are always experimenting with new concepts and designs. If you have any questions about any photo please contact us.
Total photos in gallery 1296 - Latest photo update 2021/12/10 18:48:01
Asterisk(*) indicates new photos in the past 30 days
Adapter 56C to 56J ( 15 )
Algae Recovery ( 42 )
Bacterial fermentation ( 1 )
Balancer Mandrels ( 8 )
Bearing replacement ( 25 )
Botry Culture ( 2 )
Building a gantry ( 16 )
Chestnut Extract ( 9 )
CNC Coolant ( 6 )
Coconut Oil ( 8 )
Construction ( 43 )
Contaminated diesel ( 2 )
Craig's Machine ( 31 )
Cross Drill End Bell ( 10 )
Crude oil ( 5 )
Custom motor shaft ( 23 )
Experimental Motor ( 19 )
Explosion proof motor ( 3 )
Feed Cone ( 29 )
Feed Cone with Fins ( 8 )
Feed Tube ( 3 )
Filter Paper ( 7 )
Ford on WMO ( 2 )
Foundry ( 5 )
Foundry 2 ( 18 )
Gear pump ( 2 )
Grinding fluid ( 19 )
Grinding fluid 2 ( 14 )
Heaters ( 9 )
History ( 11 )
Homemade Diesel ( 7 )
Homemade diesel 2 ( 41 )
Homemade Diesel 3 ( 15 )
Homemade Diesel 4 ( 12 )
How it works ( 3 )
Hydraulic Oil ( 3 )
Keyless Bushing ( 11 )
Lab Centrifuge ( 16 )
Lab Centrifuge 2 ( 18 )
Lapidary Cutting Oil ( 2 )
Lock motor shaft ( 6 )
Magnesol removal ( 6 )
Microwave heater ( 7 )
Misc. Mods ( 4 )
Mitsubishi 4x4 on WMO ( 10 )
New Feed Cone ( 16 )
New Feed Tube ( 7 )
New Rotor 2013 ( 24 )
New rotor design ( 16 )
Oil and Contaminants ( 47 )
Oil Skimmer ( 8 )
Our Shop ( 37 )
Peristaltic Pump ( 32 )
Powder Coating ( 10 )
Renderings ( 8 )
Retrofit rotor for WVOD ( 17 )
Rework Mount ( 10 )
Rotor fins ( 34 )
Rotor Fins One Piece ( 6 )
Seal ( 6 )
Sea Weed ( 4 )
Sediment removal ( 16 )
See thru lid - Building ( 16 )
See thru lid - Testing ( 28 )
Sight Glass ( 6 )
Skim Tube ( 56 )
Skim Tube for VCO ( 8 )
Small Settling Tank ( 14 )
Tanks ( 9 )
Tanks - Complete System ( 13 )
Tap drain ( 10 )
Testing Seal Screws ( 6 )
Tests by fuelfarmer ( 22 )
Turn key machine ( 38 )
Two part rotor ( 30 )
Ultrasonic filter cleaning ( 8 )
Updates ( 26 )
Users Machines ( 34 )
Vacuum pickup ( 3 )
VW on WMO ( 7 )
Water-Oil Seperator ( 7 )
Water trap ( 5 )
Wine Clarification ( 4 )
WVO Heat Tests ( 7 )
WVO Pump ( 6 )
WVO Tests ( 14 )
New rotor design
Since the first rotor we built in 2006 we have been working to refine the design. Over the past few years we have learned a lot about designing, using, and building centrifuges. Our newest design features a shrink fit stainless steel shaft taper, a custom stainless steel nut, and super smooth flowing feed cone assembly. Assembly screws and thread inserts are all stainless steel.
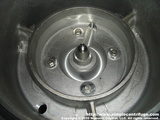
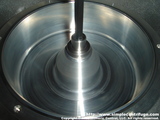
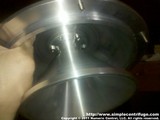
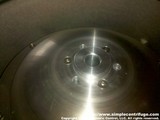
We replaced the trantorque bushing with our own custom made stainless steel fast taper. Early version were held in place with a set screw. This final version uses a light heat shrink fit which guarantees the most concentric mounting possible. The assembly is now held to the taper using a custom stainless steel nut, purpose made for this application. The nut is sealed with an o-ring. You can now remove the rotor full. We have eliminated the drain holes which allows increased capacity and improved the flow rate. This photo shows the bottom of the nut which is retained by a clip. You can also see the taper.
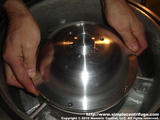
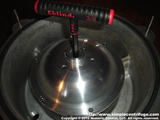
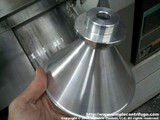
This is the lid and feed cone assembly. Super smooth. The sloped surface promotes clumping. The elimination of the tubes greatly improves the distribution inside the rotor and forces all incoming material to the bottom of the rotor. The new design is nearly a pound lighter than previous feed cones. This is the rotor sitting on the taper waiting to be tightened down. Use a 3/8
This is the lid and feed cone assembly. Super smooth. The sloped surface promotes clumping. The elimination of the tubes greatly improves the distribution inside the rotor and forces all incoming material to the bottom of the rotor. The new design is nearly a pound lighter than previous feed cones. This is the rotor sitting on the taper waiting to be tightened down. Use a 3/8" t-wrench (supplied) to tighten the rotor.
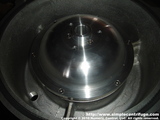
This is the rotor installed. Note the three holes on the top. The oil now exits those holes rather than around the entire edge of the lid. This smooths the flow inside the rotor. The rotor can now be removed full, allowing it to be drained and cleaned on the bench. A production user might want two rotors allowing them to switch out the dirty rotor for a clean one. After removing the rotor it can be drained off the machine. This makes cleaning and maintenance much easier.
This is a rendering of the newest feed cone design. It was rendered as clear glass allowing a clear view into of the feed cone. Created a sliced rendering of the basic model. It doesn't show all the parts but should give you and idea of the new feed cone design. This is the feed path diagram for the new rotor and feed cone design. Dirty oil enters the center of the feed cone. The incoming oil is forced to the bottom of the rotor where it begins separating. Heavy waste is captured on the outside rotor wall. The clean oil moved to the center of the rotor. Clean oil leaves the rotor from the three holes near the center of the top.
Improved the shape and closed the neck of the feed horn. This increases the head pressure into the rotor while preventing back splashing. This part will later be drill and have captive nuts installed. This is the feed horn from the under side. Installed on the upper half of the rotor.
Complete rotor installed on the machine.    
Numeric Control, LLC
PO Box 916
Morton, WA 98356